Quickstart: Workflow
In this quickstart, you'll run an order processing workflow on Catalyst Cloud. You will learn how to:
- Provision a Catalyst project with a managed workflow engine using the Diagrid CLI.
- Run a stateful, multi-step order workflow that chains inventory checking, payment processing, and notification activities.
- Start, monitor, and inspect workflow executions using both the API and the Catalyst web console.
1. Prerequisites
Before you proceed, ensure you have the following prerequisites installed.
- Python
- .NET
- JavaScript
- Java
2. Log in to Catalyst
Authenticate to Diagrid Catalyst using the following command:
diagrid login
This command opens a new browser window where where you'll be shown a confirmation code that should match the code in your terminal. Confirm the code, and if you're not logged into Catalyst, you'll be redirected to login.
Confirm your user details are correct using the following command:
diagrid whoami
The expected output contains the name of the organization, your user name, and the Catalyst API endpoint.
3. Clone Quickstart Code
Clone the quickstart code from GitHub:
git clone https://github.com/diagridio/catalyst-quickstarts
Navigate to the quickstart directory:
- Python
- .NET
- JavaScript
- Java
- macOS/Linux
- Windows
cd catalyst-quickstarts/workflow/python
cd catalyst-quickstarts\workflow\python
- macOS/Linux
- Windows
cd catalyst-quickstarts/workflow/csharp
cd catalyst-quickstarts\workflow\csharp
- macOS/Linux
- Windows
cd catalyst-quickstarts/workflow/javascript
cd catalyst-quickstarts\workflow\javascript
- macOS/Linux
- Windows
cd catalyst-quickstarts/workflow/java
cd catalyst-quickstarts\workflow\java
4. Install Dependencies
Install the dependencies for the workflow application.
- Python
- .NET
- JavaScript
- Java
Create and activate a Python virtual environment:
- macOS/Linux
- Windows
uv venv
source .venv/bin/activate
uv venv
.venv\Scripts\activate
## or use .venv\Scripts\Activate.ps1
Install dependencies:
uv sync
Install .NET dependencies:
dotnet build
Install Node dependencies:
npm install
Install Maven dependencies:
mvn clean install
5. Run the application with Catalyst Cloud
The diagrid dev run command creates your Catalyst project, provisions resources (apps, workflow engine, managed state store), configures environment variables, and launches your application connected to Catalyst Cloud.
- Python
- .NET
- JavaScript
- Java
Run the application:
diagrid dev run -f workflow-quickstart.yaml --project workflow-quickstart --approve
Run the application:
diagrid dev run -f workflow-quickstart.yaml --project workflow-quickstart --approve
Run the application:
diagrid dev run -f workflow-quickstart.yaml --project workflow-quickstart --approve
Run the application:
diagrid dev run --project workflow-quickstart --app-id order-workflow --approve -- mvn spring-boot:run
Wait a few seconds until you see application logs in the terminal to ensure the application is up and running and connected to Catalyst.
6. Start and inspect a workflow instance
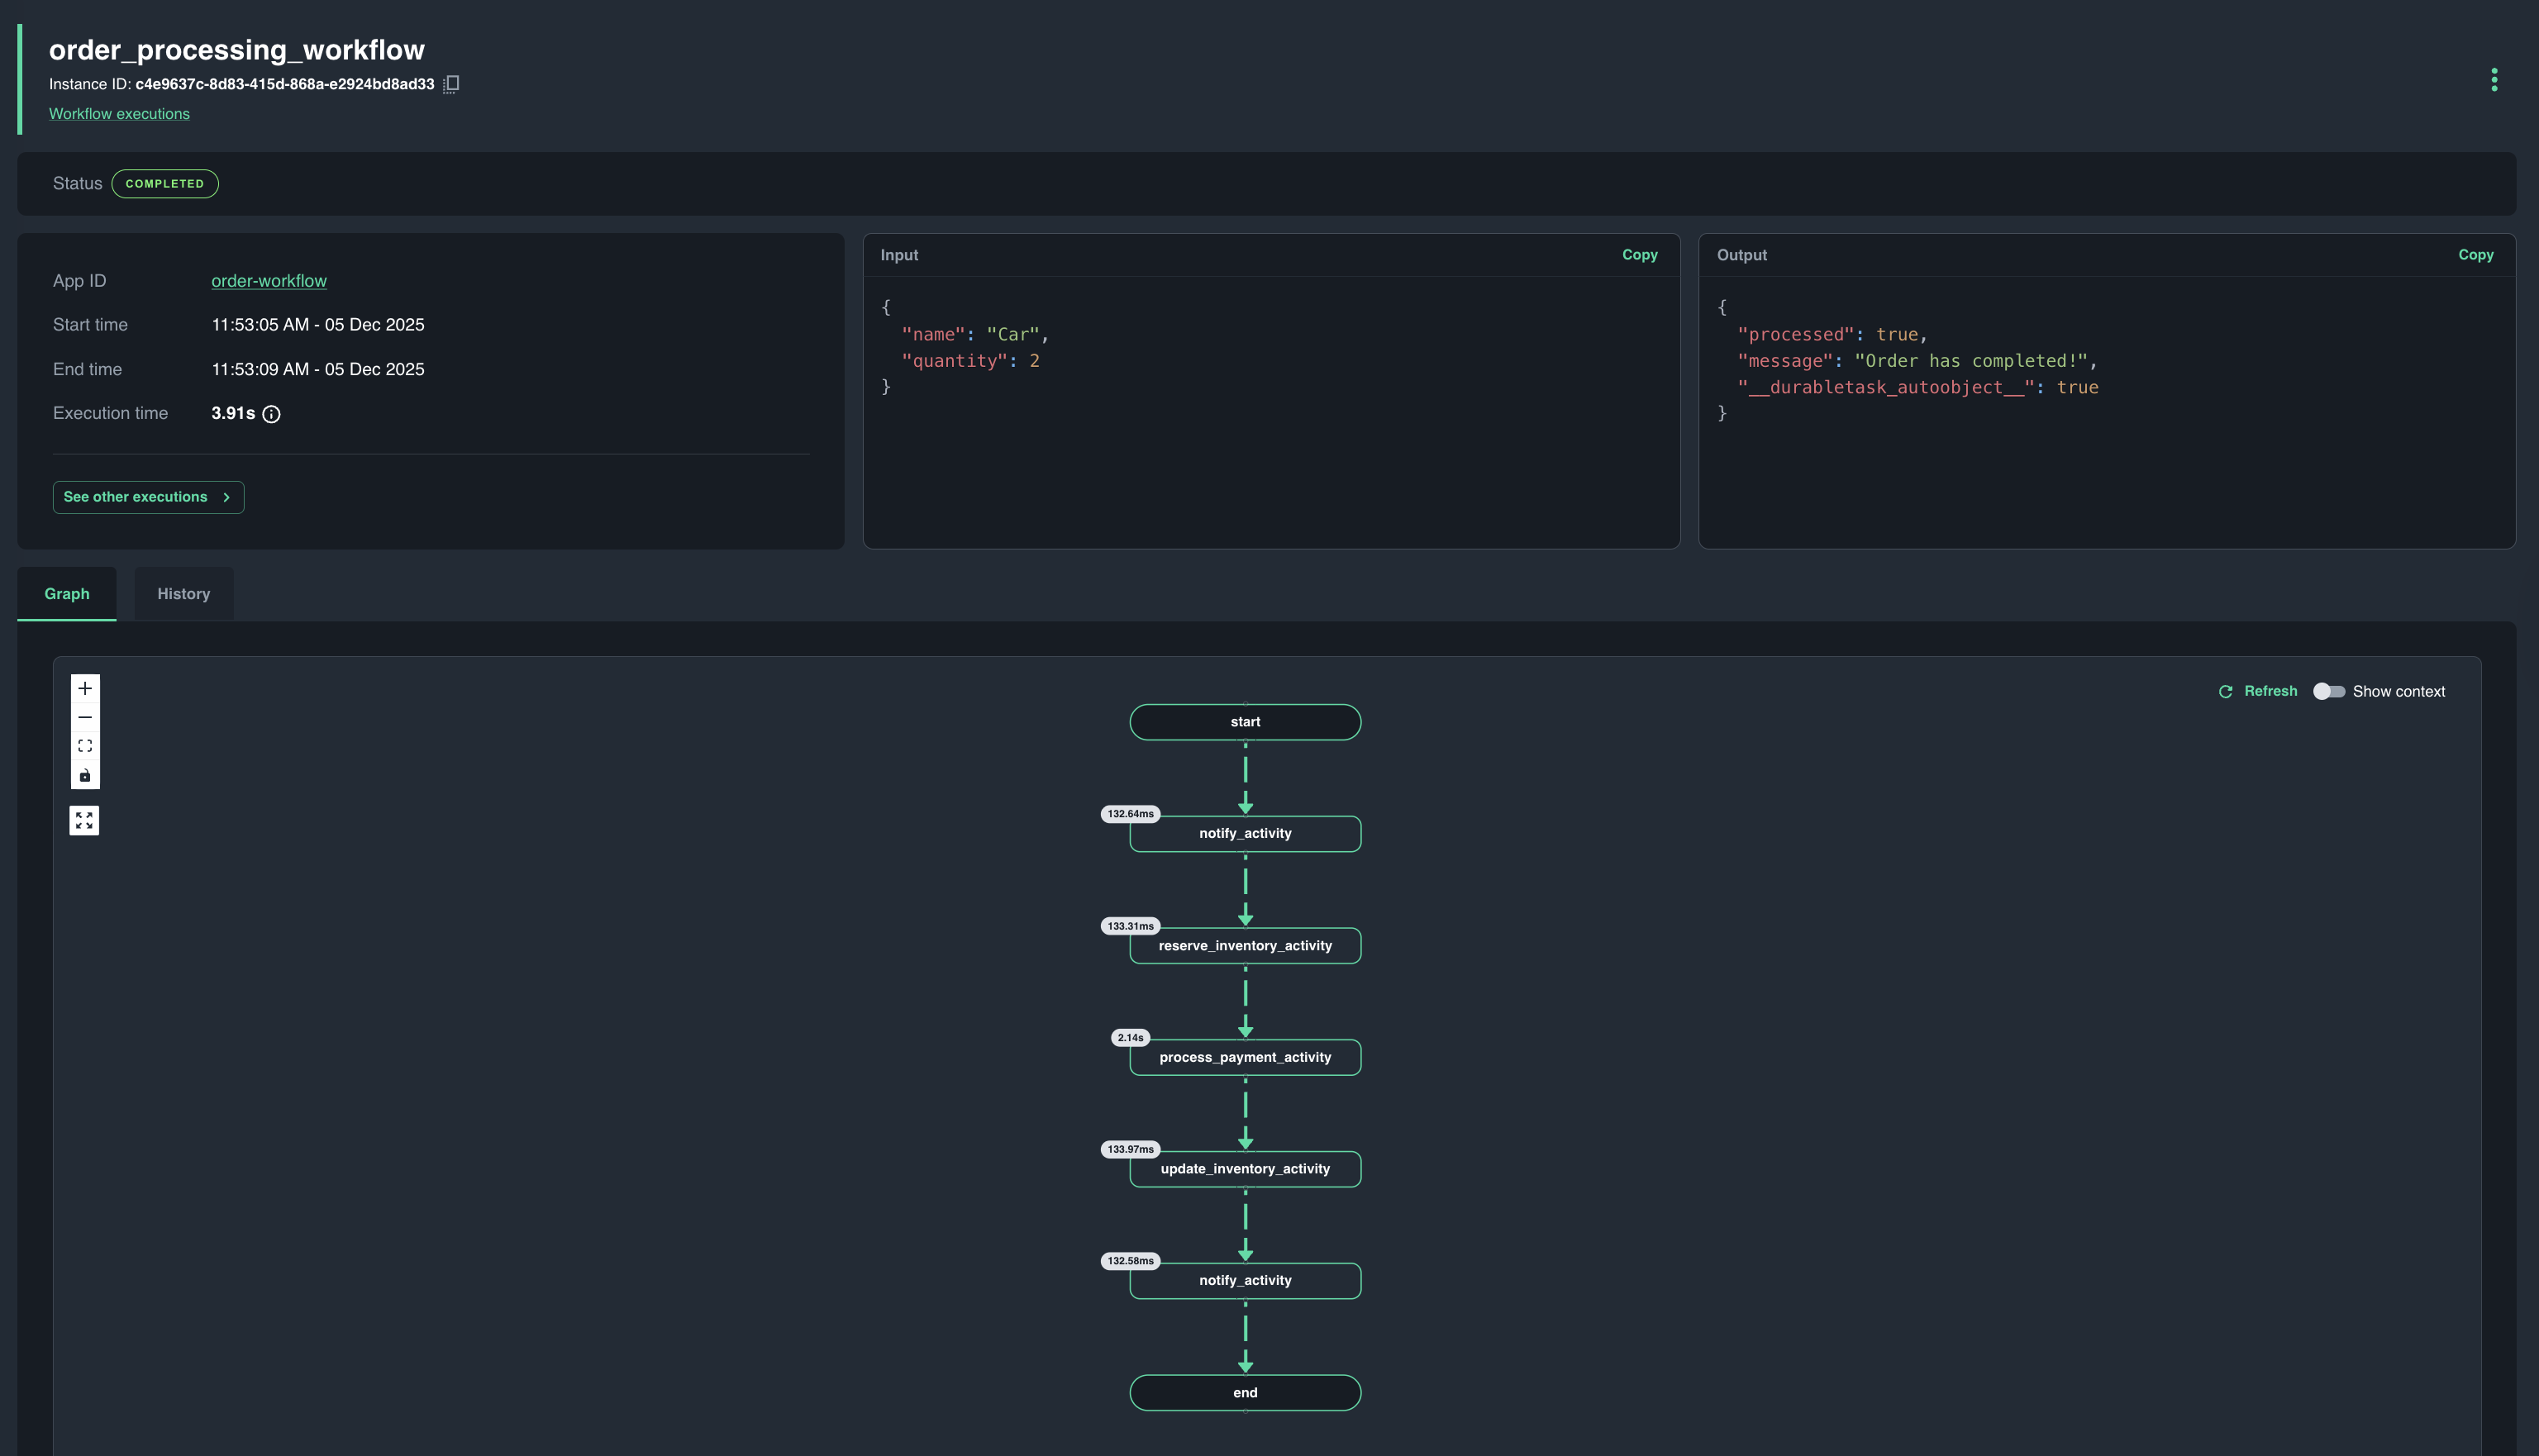
The Order Processing workflow chains notification, inventory, payment, and shipping activities, see the diagram for more details.
6.1 Start workflow
Open a new terminal and start a new workflow by making a POST request to the start endpoint:
- macOS/Linux
- Windows
curl -i -X POST http://localhost:5001/workflow/start -H "Content-Type: application/json" -d '{"name":"Car", "quantity":2}'
Invoke-RestMethod -Method Post -Uri "http://localhost:5001/workflow/start" -ContentType "application/json" -Body '{"name":"Car", "quantity":2}'
This returns a workflow instance ID. Copy the value from the response and save it as an environment variable for subsequent calls:
- macOS/Linux
- Windows
export INSTANCE_ID=<YOUR_INSTANCE_ID>
$env:INSTANCE_ID = "<YOUR_INSTANCE_ID>"
6.2 Get workflow status
Get the workflow status by making a GET request to the status endpoint and providing the instance ID.
- macOS/Linux
- Windows
curl -i -X GET http://localhost:5001/workflow/status/$INSTANCE_ID
Invoke-RestMethod -Method Get -Uri "http://localhost:5001/workflow/status/$env:INSTANCE_ID"
The response is a JSON structure that is similar to this:
{
    "exists":true,
    "isWorkflowRunning":false,
    "isWorkflowCompleted":true,
    "createdAt":"<DATE_TIME>",
    "lastUpdatedAt":"<DATE_TIME>",
    "runtimeStatus":1,
    "failureDetails":null
}
6.3 View in the Catalyst web console
Open the Workflow viewer in the Catalyst Cloud web console and select the workflow instance that you just started to see a visual execution trace. The viewer displays each activity in sequence, its completion status, and the total workflow duration — useful for debugging long-running or failed executions.
7. Clean Up
Press CTRL+C in the terminal that runs diagrid dev run to stop the application and disconnect from Catalyst Cloud.
To delete the entire project and all provisioned resources:
diagrid project delete workflow-quickstart
Summary
In this quickstart you:
- Logged in to Catalyst and provisioned a managed workflow project with a single CLI command (
diagrid dev run). - Ran an order processing workflow that's using task chaining.
- Inspected workflow execution state using the
statusendpoint and the Catalyst web console.
Catalyst handled workflow state durability, activity orchestration, and retries automatically — no infrastructure to manage.
Next steps
- Explore the Workflow SDK guides for building workflows from scratch, understanding workflow patterns, and resiliency.
- Try the Workflow Composer to scaffold workflow projects based on diagrams or try our Claude skills for Dapr to build entire Dapr workflow applications.