AWS Marketplace Installation Guide
This guide walks you through deploying a Self-hosted Catalyst region to your own AWS account after subscribing to Diagrid Catalyst Enterprise on AWS Marketplace. The end-to-end journey is described in four phases: subscribing, registering, deploying with CloudFormation, and verifying.
Prerequisites
AWS Account
- An active AWS account with a valid payment method
- An active AWS deployment region selected before deployment time
IAM Permissions
- It is required to run the stack with a role that has AdministratorAccess given it creates EKS, EC2 (VPC, NAT Gateway, bastion instances, launch templates), IAM, KMS, SSM, CloudWatch Logs, and Auto Scaling resources.
- It is required to acknowledge IAM capabilities in the CloudFormation console before your click Create stack given the stack creates named IAM roles.
Service Quotas
Ensure the following quotas are available in the deployment region of your choice:
| Resource | Required | Default limit |
|---|---|---|
| Elastic IP addresses | 3 (one per Availability Zone) | 5 |
| NAT Gateways | 3 (one per Availability Zone) | 5 |
| VPCs | 1 | 5 |
| IAM roles | 10 | 1,000 |
Elastic IP and NAT Gateway increases go through AWS Support review and take 1 to 2 business days. Request them early if you're near the limit.
Network Requirements
The CloudFormation stack provisions its own VPC and NAT Gateways, so outbound internet connectivity works out of the box — no manual networking setup is required in a standard AWS account.
If your AWS account enforces additional egress controls (for example, Service Control Policies, an egress firewall, or an outbound proxy) you need to allow outbound HTTPS to the Diagrid Cloud endpoints and to the AWS Marketplace container registry (ECR) so the deployment can register the region and pull Catalyst images. Do not TLS-inspect this traffic, Catalyst uses mTLS, which breaks if the connection is intercepted.
Marketplace Subscriptions
The following step-by-step instructions will walk you through subscribing to both listings before deployment, in this order:
- 1. Diagrid Catalyst SaaS listing (paid). This listing must be subscribed to first and starts the registration flow that redirects you to the Diagrid portal. See Subscribing to products and SaaS free trials in the AWS Marketplace Buyer Guide for more details.
- 2. Diagrid Catalyst Container listing (free). This needs to be subscribed to second, before you click Deploy Catalyst. This authorizes your AWS account to pull Catalyst images from the Marketplace registry during deployment. See Subscribing to container products for more details.
Both subscriptions must be on the same AWS account that will deploy the CloudFormation stack. Subscribe to the SaaS listing first which will redirect you to the Catalyst registration flow that prompts you to subscribe to the container listing.
Step 1: Subscribe on AWS Marketplace
- Open the Diagrid Catalyst SaaS listing and sign in to the AWS account you want to deploy into.
- Click View purchase options or Try for free to activate a free trial. Click through the subscription details page and choose Subscribe.
- Click Set up your account. You will be redirected to the Diagrid Catalyst marketplace registration page.
Step 2: Register Your Deployment
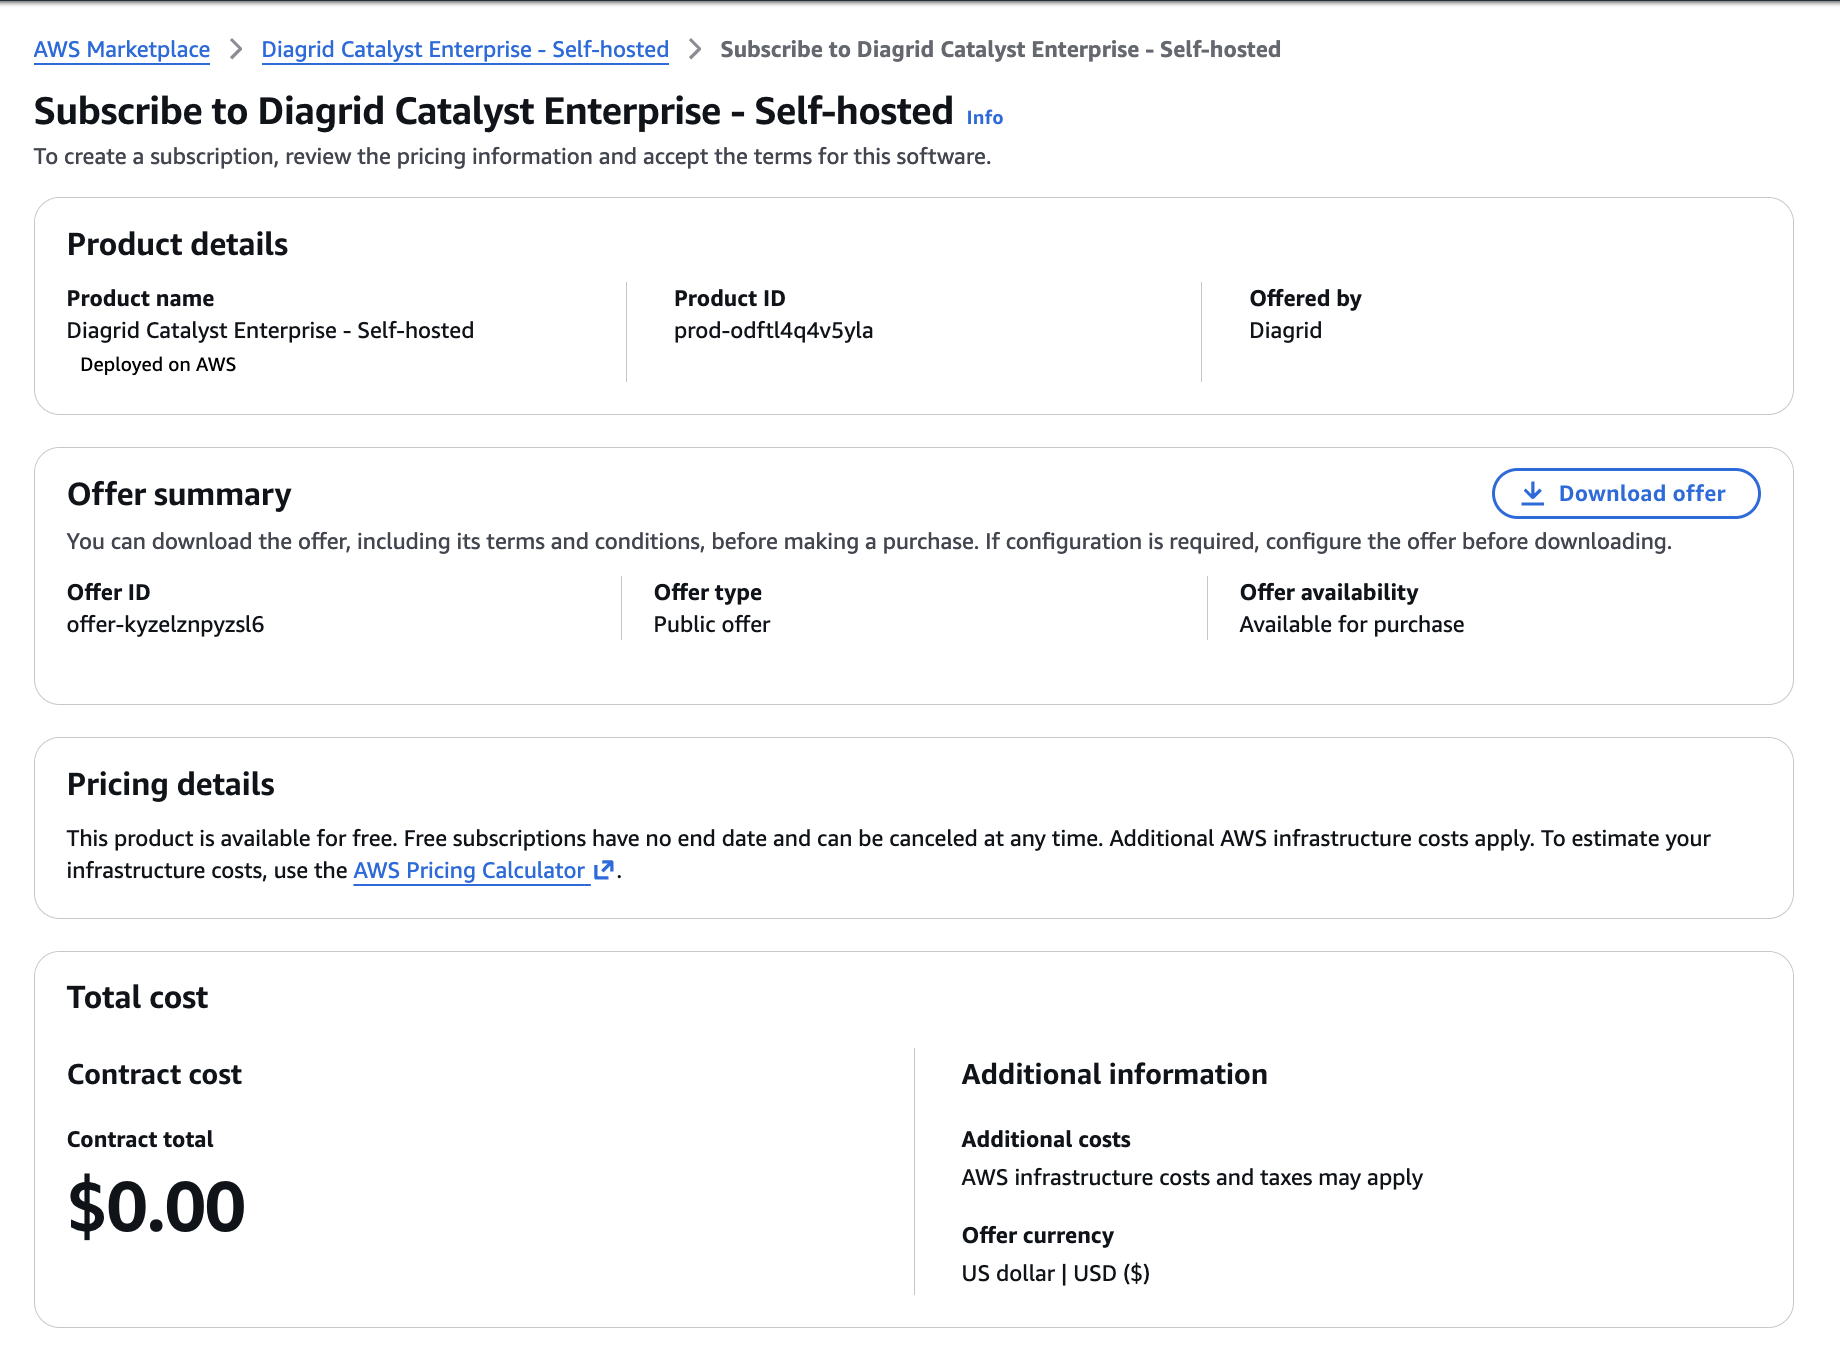
The Catalyst registration page guides you through three stages, shown in a progress bar at the top: Subscribe to marketplace, Deploy Catalyst Self-Hosted, and Deployment status.
-
You will land on the Catalyst login page. Sign up for a new Diagrid account, or log in if you already have one.
-
Subscribe to the Catalyst Self Hosted container listing subscription using the Subscribe on AWS button. This will redirect you to AWS to subscribe and then when you return the check for a subscription will re-run automatically.
-
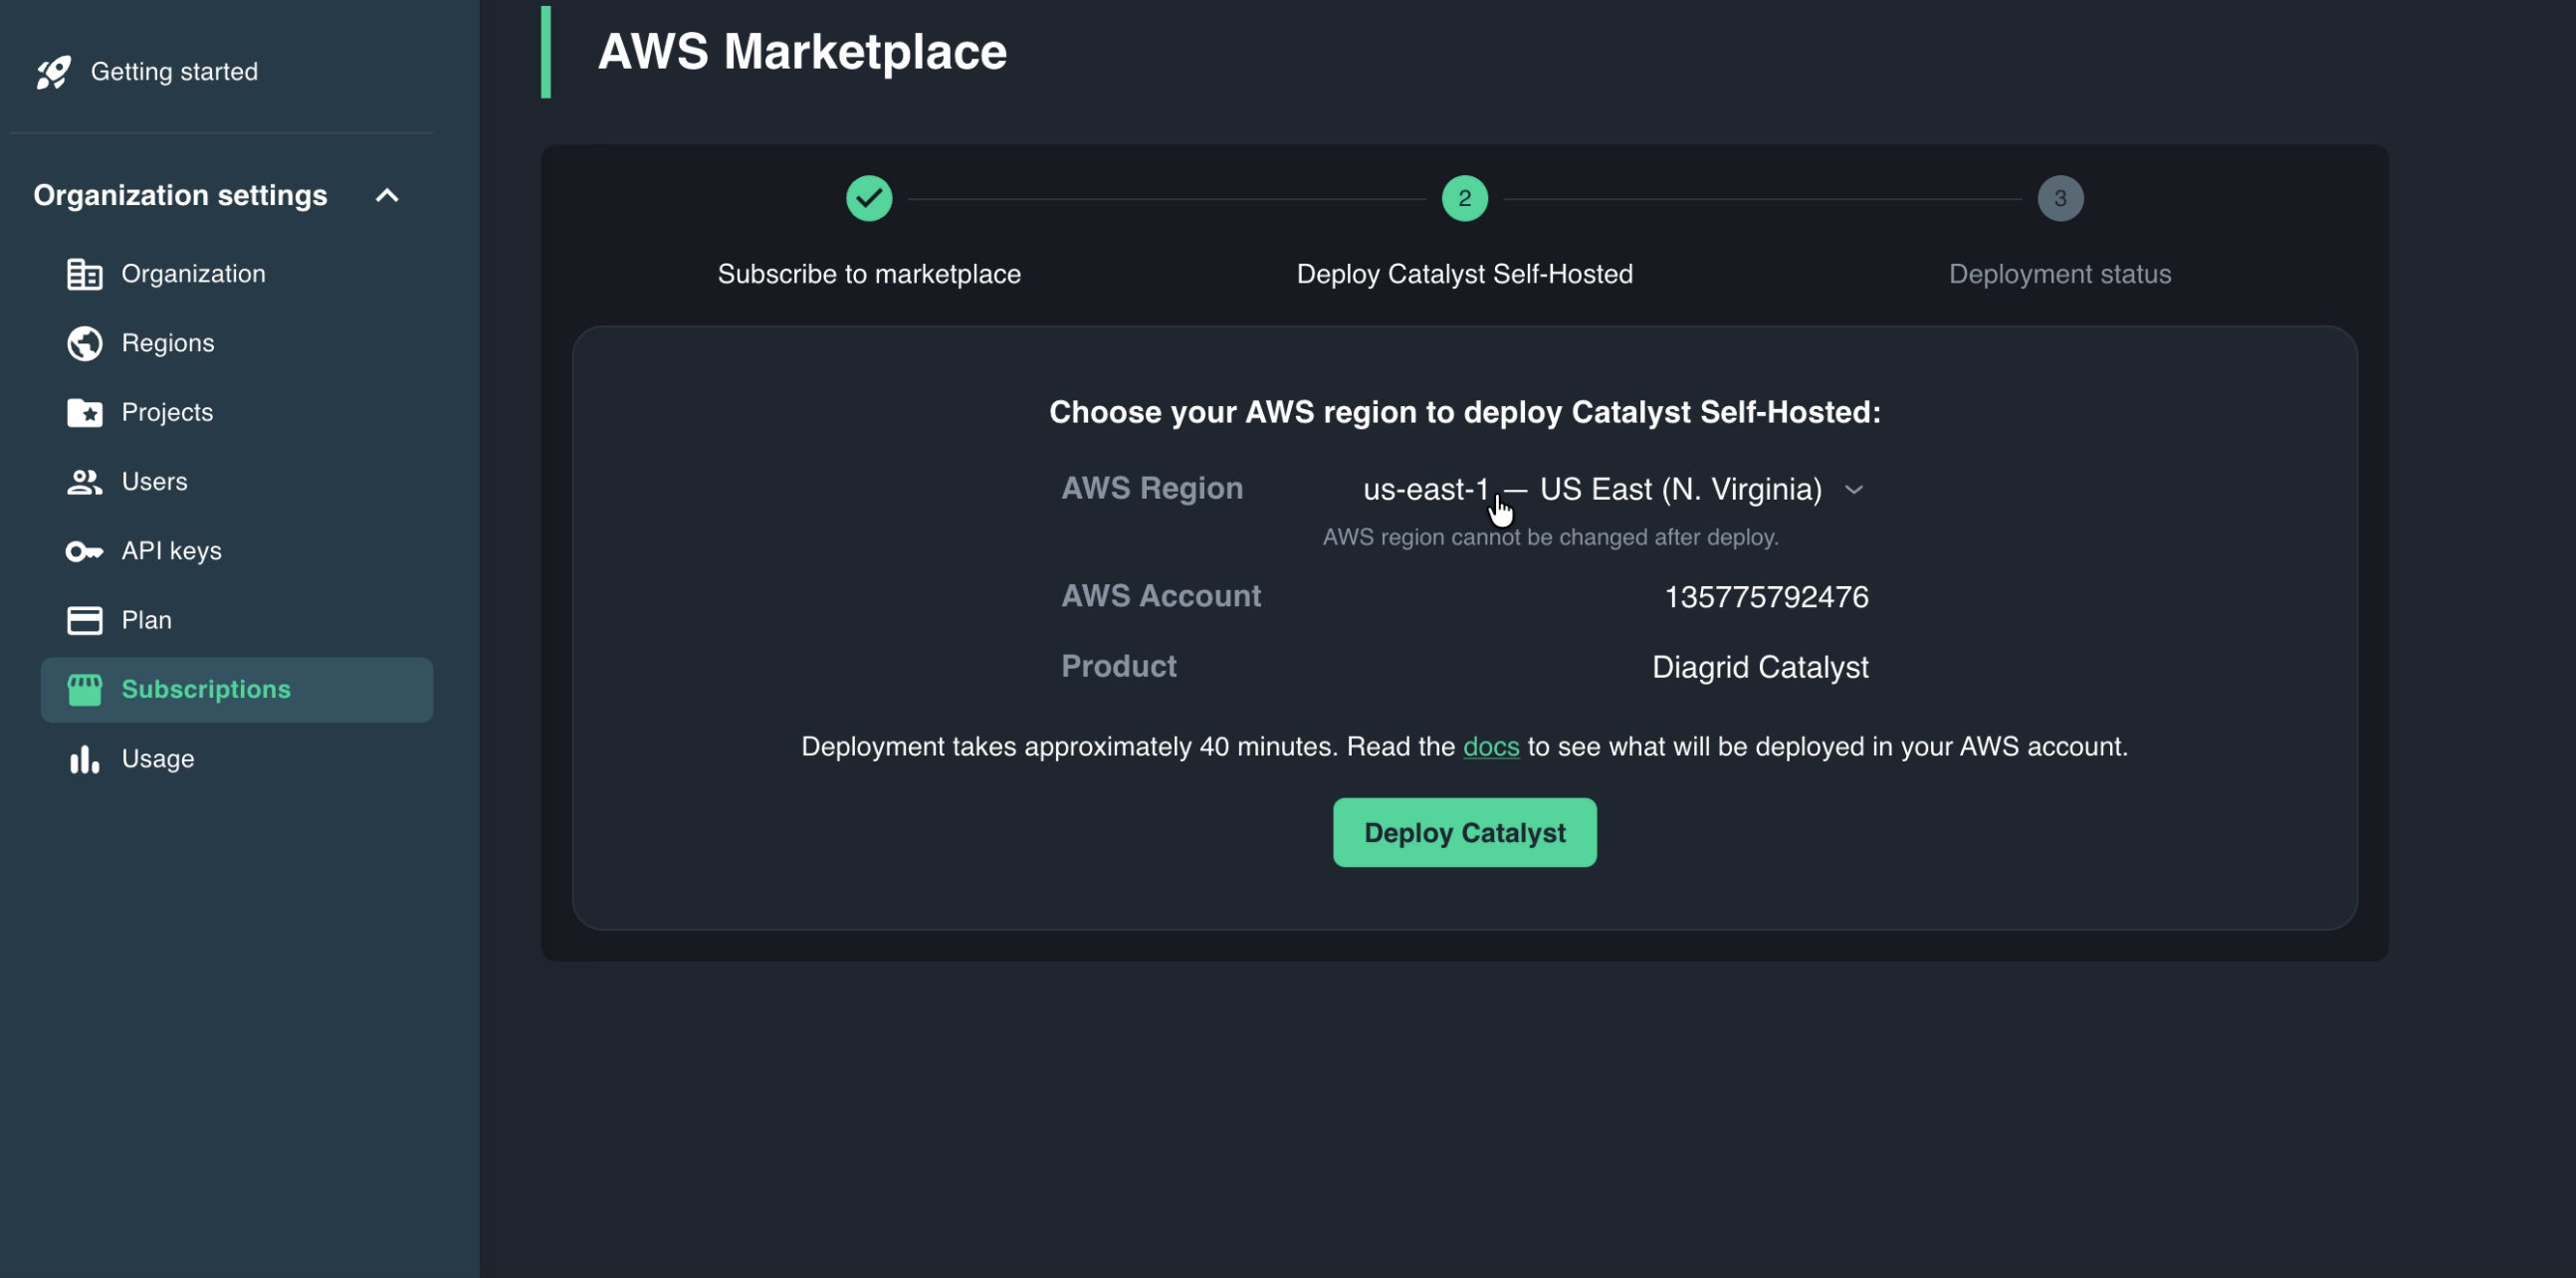
Choose the AWS region where your Catalyst region will be deployed from the dropdown menu. A new Catalyst region will be automatically created and its region name displayed (eg.
cra-12345678-abc123). -
Click Deploy Catalyst to open the AWS CloudFormation Quick Create console in a new browser tab, with the template and your region's join token already filled in — you don't need to copy anything. Keep the Catalyst portal browser tab open as you will return here after deployment to verify your region.
Step 3: Deploy the CloudFormation Stack
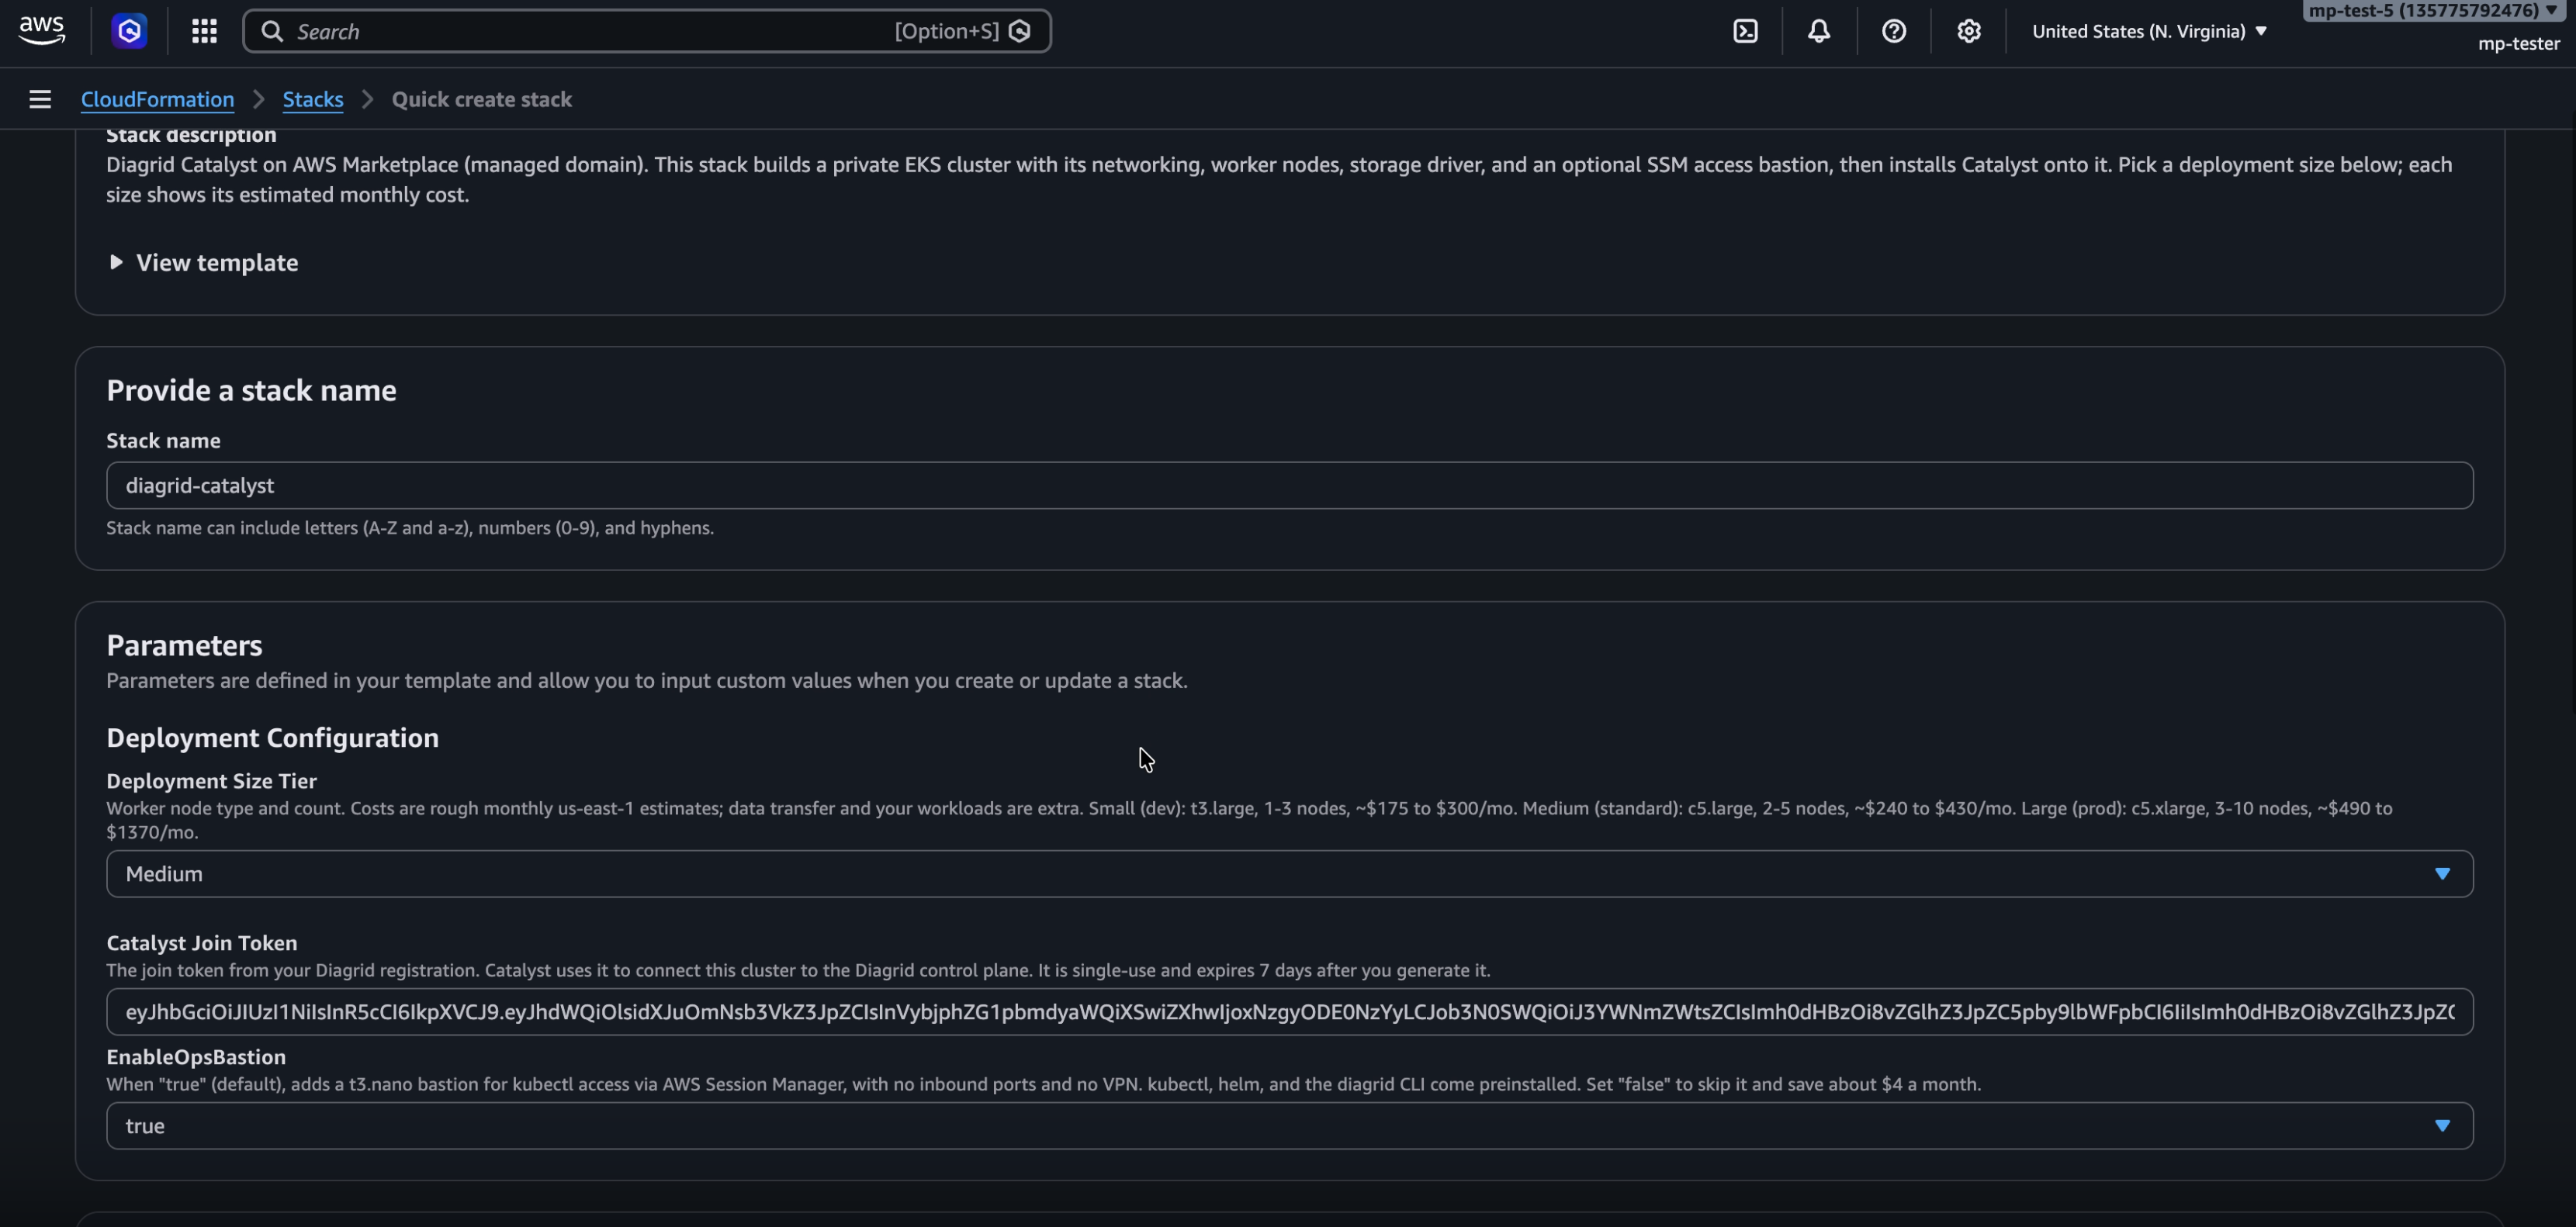
CloudFormation Quick Create pre-fills the template URL, the stack name diagrid-catalyst, and the deployment token.
- Set DeploymentSize to
Small,Medium, orLarge. The tier controls the EKS node group instance type and autoscaler bounds (t3.large1–3 nodes for Small,c5.large2–5 nodes for Medium,c5.xlarge3–10 nodes for Large). The CloudFormation template description shows the monthly cost range for each tier; size your own estimate at calculator.aws. - Check the IAM acknowledgement box.
- Click Create stack.
The stack takes about 40 minutes to create. You can monitor progress in the AWS CloudFormation console under the stack's Events tab.
Infrastructure Resources Deployed
The stack provisions the following infrastructure in sequence:
Networking: A VPC with public and private subnets across multiple Availability Zones, an Internet Gateway, NAT Gateways, security groups, and a KMS key.
Kubernetes cluster: A private EKS cluster is created with a managed node group at the size you selected, Pod Identity bindings, and core addons (VPC CNI, kube-proxy, CoreDNS, EBS CSI). The cluster API endpoint is private (not publicly accessible).
Ops bastion (optional):
A small SSM ops bastion (t3.nano, ~$4/month) is deployed in a private subnet, providing kubectl access to the private EKS cluster through AWS Systems Manager Session Manager — no VPN required. Set EnableOpsBastion to false to skip it.
Catalyst region installation: An ephemeral EC2 install bastion authenticates to the AWS Marketplace ECR using your container listing subscription, installs the Helm chart on the cluster, validates readiness, signals CloudFormation, then scales to zero. Once the Catalyst region connects to the Diagrid-hosted control plane, the deployment completes.
When every phase completes, the stack status moves to CREATE_COMPLETE and Diagrid provisions the managed domain for the region. You don't configure DNS or certificates.
Step 4: Verify Your Deployment
Check the Region status
Return to the Catalyst tab or go to the Catalyst portal and log in:
- Navigate to Organization Settings -> Regions in the left sidebar.
- Find your newly created region and check the following two status indicators:
| Field | Values | What it means |
|---|---|---|
| Connection State | joining → online | joining means Catalyst has not connected yet. online means the agent is connected and communicating. |
| Status | ready | The region is fully operational. |
Once the region shows online and ready, your deployment is complete.
Check the Ingress Address
In the region detail view, the Ingress Addresses section shows the IP address or domain for your Catalyst region's gateway.
Troubleshooting
If the deployment fails or the region does not reach online / ready status, delete the stack in the AWS CloudFormation console and redeploy. If the issue persists, contact Diagrid support.
Access the Cluster Directly
If you need to troubleshoot the cluster, connect to the SSM ops bastion through AWS Systems Manager Session Manager (no SSH key or VPN required):
aws ssm start-session --target <ops-bastion-instance-id>
The bastion has network access to the private EKS cluster, so you can run kubectl commands from there. If you deployed with EnableOpsBastion=false, re-enable it with a stack update first.
Next Steps
With your Catalyst region running, try the Operator Quickstart to create a project that your team can build in.